How about make your own.
OK, so beer can't be made entirely in one night, but all you need to get started is a good stretch of a few hours. Beer is ultimately just another form of food preservation. Much like freezing, canning, dehydrating, jamming and salt curing, beer brewing is part of a long tradition of taking a freshly harvested food product with a short shelf life and making it last longer. In the good ol' days longer meant "a sufficient period of time to get through the long, harsh, cold, winter when no fresh food was available"...talk about a food desert. However, I am sure the delicious taste and relaxing qualities of this beverage had nothing to do with the growth of beer's popularity. How else were people expected to use all their barley and wheat before it went bad?
We can specifically thank fermentation for making this good brew happen. Oh dearest fermentation, what would we do without you and the delicious sauerkraut, wine, kimchi, yogurt, kombucha, soy sauce, vinegar, chorizo and bread you create for us? I could go on here...but I won't. Basically, fermentation is the chemical process in which carbohydrates (sugars) are transformed into alcohol and carbon dioxide in an oxygen free (anaerobic) environment thanks to the work of yeast or bacteria (or both). The best part, there's a special word for the scientific study of fermentation: zymurgy. (Which is also the convenient title of the American Homebrewers Association magazine).
 Making beer at home requires a bit more equipment, patience, knowledge, space and time than other food preservation endeavors, but that's part of the fun. The upside is, as most home brewers proudly spout, there's nothing in home-brewed beer that could kill you - unlike, say, low-acid vegetables and their friendly resident botulism. Plus, there are a good number of beer brewing instruction manuals, for the beginner to the advanced, to help you along the way.
Saturday, as the mercury was rising mid-day, we found ourselves embarking on an activity that has long been on the to do list: beer creation. Technically, it's more of creating the right environment for yeast to turn barley tea into beer through the fermentation process, as the yeast does most of the work. Somewhat spontaneously, we got underway, inspired by a free afternoon and a prominently displayed homebrew book at the library. Nikki set out as the master brewster...and I her sous-brewster and documentarian. Our two-woman team historically appropriate, as many of the original beer makers were women, hence the term brewster. (What was Punky doing in her free time?)
We moved swiftly, selecting a recipe from The Complete Homebrew Beer book (Black IPA), taking the dog for a quick walk (it was hot out!), and heading to the Wine & Hop Shop on Monroe Street (which we already visited on our first day in town). And there all swiftness stopped. With a well-researched and detailed list in hand, we perused the store for almost two hours. We gathered our basic equipment like a large stainless steel brewing pot, a 6-gallon plastic bucket with special lid, siphon hook thing, and big glass carboy. I had never purchased a siphon before, nonetheless a large brewing sock or bottle filler or #2 plug. We were a bit giddy, and we also pretended to know exactly what we were doing.


Nikki asked pointed beer brewing questions to the very helpful and very patient store staff while gathering ingredients for the process. How to determine the amount of hops needed? Where to find Irish moss? How exactly to use the electric milling machine in the store (to crack the malt so the maximum sugar is extracted)? Which air lock comes best recommended? We pulled bittering hops and aromatic hops from the cooler after much debate. We selected our three malted grains from the enormous bulk selection, and then milled them. We picked the correct yeast from the cooler, with 300 billion organisms in one tiny pouch. All while munching on hops candy, and still pretending that we knew what we were doing.


The process of shopping brought us one step closer to understanding the actual steps we were about to undertake. At least for Nikki. I got distracted by all sorts of things like cider making (yes, they rent cider presses), why my first batches of ginger ale didn't turn out well (I didn't let it ferment long enough) and the fact that all homebrew supplies seem to be made in Oregon. Finally, finally, we checked every item off our list. Our newly acquired purchases in hand, we broke a sweat walking to the car in heat of the day.
 |
| Our loot, all collect at the register. |
 |
| Ingredients Ready! |
 |
| They gym sock and malt |
 |
| More gym sock action |
 2. Sparge. Yup, you heard me. Remove your enormous gym sock from the brew pot, place it in a colander over your brew pot, and pour warm brewing water over it to extract the last of the steeped goodness from your gym sock. Around 11:25 pm, after resigning from my sous-brewster responsibilities for the night and heading upstairs, I heard quite the harumpus in the kitchen. I traipsed back down the stairs to see a frustrated brewster surmising the wall, stove, floor and more covered with brown, wet barley tea. As she was sparging the gym sock, the colander slipped and splashed into the brew pot, sending beer tea all over the kitchen. I wish I had photos of this. We cleaned, I giggled, she completed the sparge, I went back to bed, and the brewing continued downstairs without me. After sparging, the beer tea is brought back up to a rolling boil. The spent grain (aka the contents of the gym sock) was saved as a delicious treat for the chickens at the farm. More on that to come later.
3. When boiling resumes, the pot is taken off the heat. At this point the liquid malt is added to the brew pot and stirred until fully incorporated at a rolling boil. This liquid malt, slightly sweet and more viscous than maple syrup, is a condensed version of the beer tea from step one. Its purpose is to...ummm...I don't know. My guess is that you would have to use so much grain in your gym sock that it's worth it to cheat and use the condensed liquid malt.
4. With the liquid malt fully incorporated at a rolling boil, add the bittering hops to the brew pot and let it roll for 45 minutes. Nikki selected Northern Brewer hops, at 12 AAU (alpha acid units) which is hoppy for an IPA, but not overly bitterly hoppy (ick). During this long boil , and instead of watching water boil, Nikki started a brewster's journal, re-re-re-read the beer recipe, sterilized the equipment for the next steps, did some dishes and danced - all while preventing a foamy layer from establishing itself on the top of the pot.
5. After the lengthy 45 minute boil, one pound of demerara sugar, Irish moss and yeast nutrient are added to the brew pot and boiled another fifteen minutes. The sugar provides "food" that the yeast eat and turn into alcohol, the Irish moss is for clarifying the brew and the yeast nutrient is (yet again I am guessing) a 'vitamin' that encourages the yeast to eat and ferment. I have no idea if that is right.
6. As we approach the end of the brew pot phase, half of the aroma hops are added to the brew pot, Cascade hops in this case. Then the fun starts.
7. As you now know, yeast are the rock stars of the fermentation process. And just like rock stars, they make specific, elaborate requests for their lodging. The yeast request a comfortable 72 degree, oxygen free living environment while they are 'on tour' in your brew. It would be so easy if they enjoyed the boiling temperatures in your brew pot, but unfortunately that would kill them. So, you now have to do your best to get the contents of your three gallon pot of boiling water down to 75ish degrees in less than 45 minutes. The tactic used here: ice and cold water constantly flowing around the brew pot as it sits in the kitchen sink. It took an hour, on the first try...not too bad. This is a good time to point out that after at least two and a half hours of full-blast gas use on our kitchen stove and an hour of cold water from the faucet...resource conservation in not a priority in home brewing...at least in your first go round. I will leave it at that.
8. After the swift cool down, a magic siphon is used to transfer the beer tea + sugar + moss + hops mixture to the primary fermenter, aka a plastic bucket with a fancy lid. Although I understand the physics behind siphons, they still amaze me. This step is called "racking" the beer, which also makes me think of playing pool.
9. The almost last step of the first stage of brewing is to pitch the yeast into the primary fermenter, stir, affix the airtight lid and insert the airlock. The airlock lets carbon dioxide out of your bucket without letting oxygen in...as our rock star yeast don't perform well with all that oxygen riffraff around. Then, you live with a big, white plastic bucket in your dining room for 7-10 days as the primary fermentation is underway, ideally in a 75ish degree setting. This last part was especially hard as we are in the middle of a heat wave and the thermostat, conveniently located next to the beer bucket, read a consistent 88 degrees.
10. After the primary fermentation, the brew mixture is carefully siphoned out of the primary bucket and into the carboy. The airlock is affixed again, the six gallon glass jug is carried awkwardly to the basement, where it sits for round two of fermentation. Lonely, and kept in the dark, the carboy stays cool for this slower round of fermentation.
And that my friends, is all I can tell you. Sounds simple enough, no? The basic steps after this include transferring the brew mix to yet another bucket and then filling all fifty 12oz bottles of beer from there. One must also acquire fifty empty 12oz beer bottles, wash them, remove labels, box them in her kitchen, and then sterilize them before use. I've decided brewing your own beer requires lots of friends: those who bring you their empty brown beer bottles and those who help you drink your creation. Yup, we're in the process of collecting 50 used beer bottles, and I am preparing for some sort of entertainment so we can get through 50 bottle of beer!
Brewing beer, much like any cooking adventure, is just a big science experiment in your kitchen. A fun, messy experiment with no instant gratification. So as we wait for about 5 weeks with our fingers crossed, checking for bubbles through the airlock, all we can do is hope. Hope that this experiment pans out and that we have a tasty beverage to enjoy with friends, and appreciate the talents of brewers who make craft beer for a living (oh, and prepare for our next batch: hop harvest ale).
----
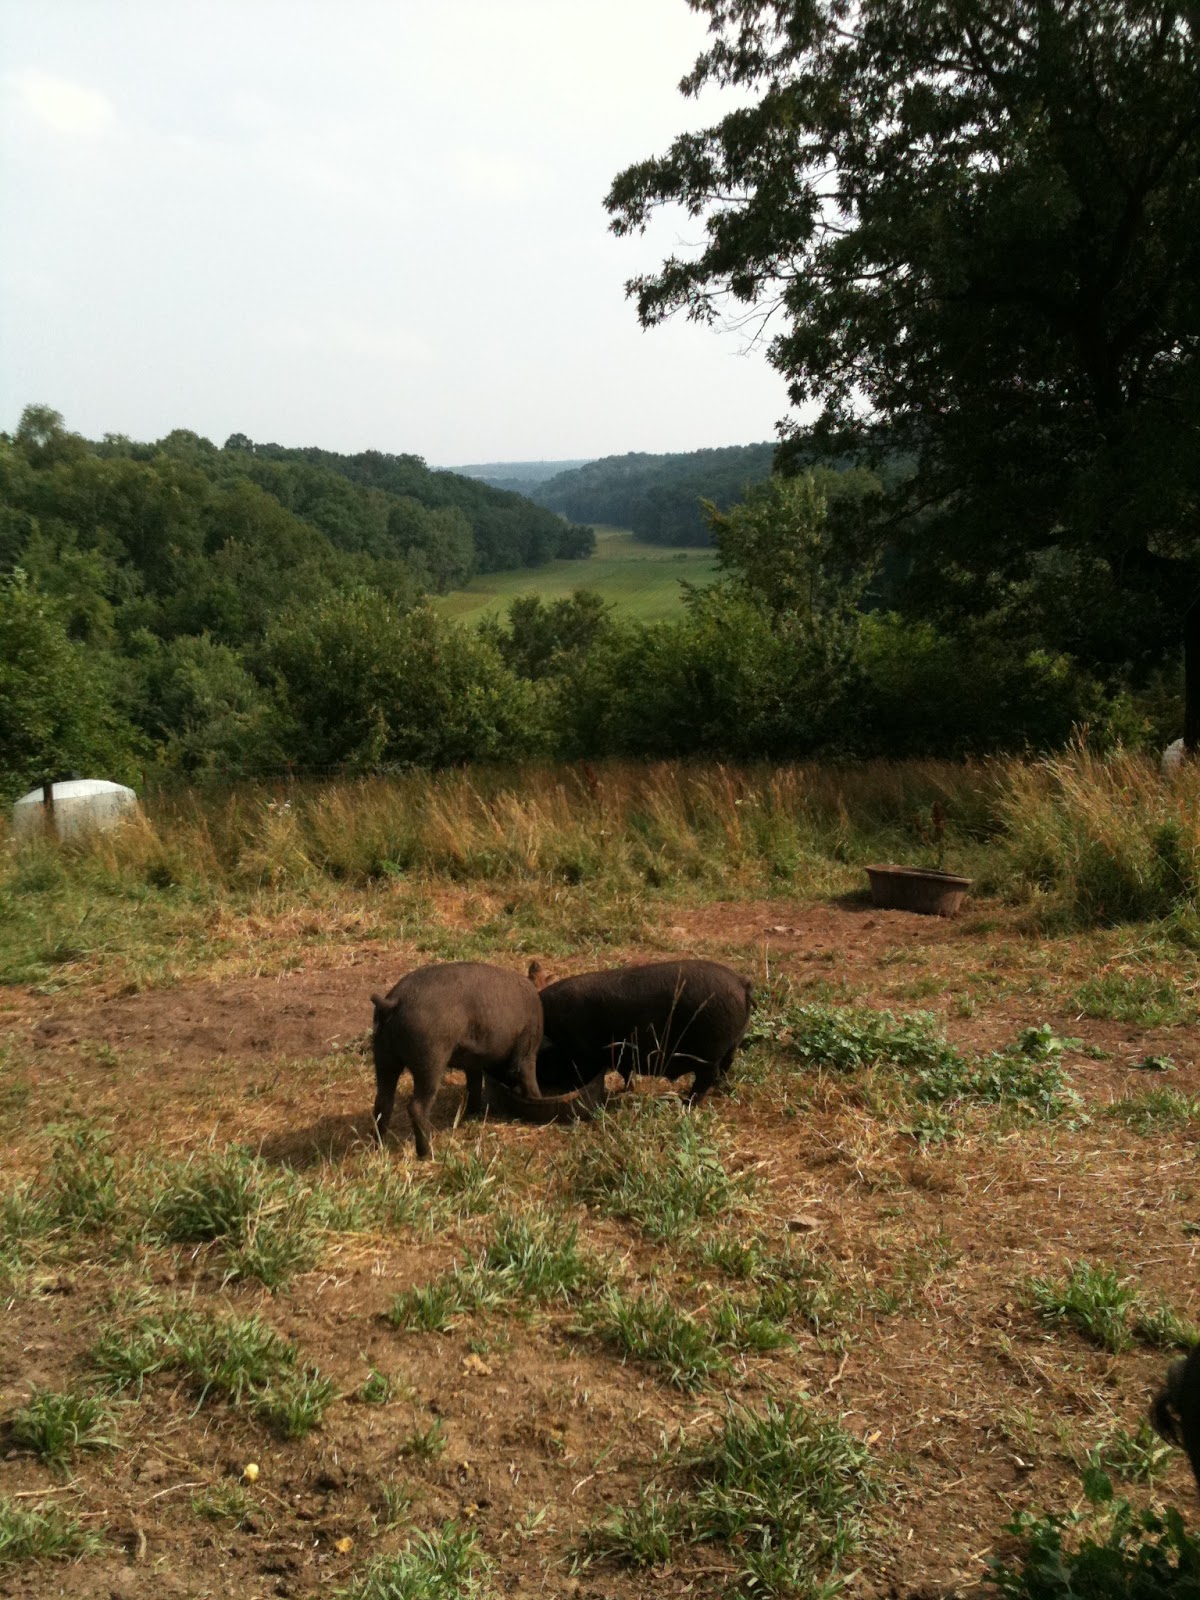
 As a post note, on Monday morning I brought the spent grain to the farm to be enjoyed by the animals who so graciously give us so much food. Diana suggested the pigs would be the best recipients, and that it would be a fair trade for the whey I steal from their buckets for my bread making. I was excited. During the regular afternoon chores, and at normal pig feeding time, I pour the spent grain from the gym sock onto the pasture with delight, just waiting for six snouts of the young heritage pigs to shovel it across the ground, fighting to eat it all. But instead, nothing. These piggies were perfectly content with their whey and grain ration, and the fruit laden limb fallen off one of the apple trees. Oh well, you can't have it all.

No comments:
Post a Comment